How to Create an iOS Sticker Pack – A Tutorial Walkthrough
The new iOS Sticker Pack apps are flooding into the App Store, and if you are a developer like me, you want to get in on the action. I struggled trying to find a good instructional article online but I was able to get my first sticker pack app uploaded and through Apple’s review process. So, I decided to write a tutorial on how to create an iOS sticker pack. This is not meant to be an exhaustive instruction but it should get you through the creation, certification, signing, and distribution of your first sticker app.
CREATING THE STICKERS
Firstly, you’ll want to create your sticker content. Open your favorite image editing software (I use Sketch, but Photoshop or any other photo editing software will work just fine).
Start by choosing your desired sticker size(s). The graphic below is pulled from the iOS Human Interface Guidelines article on creating sticker packs.
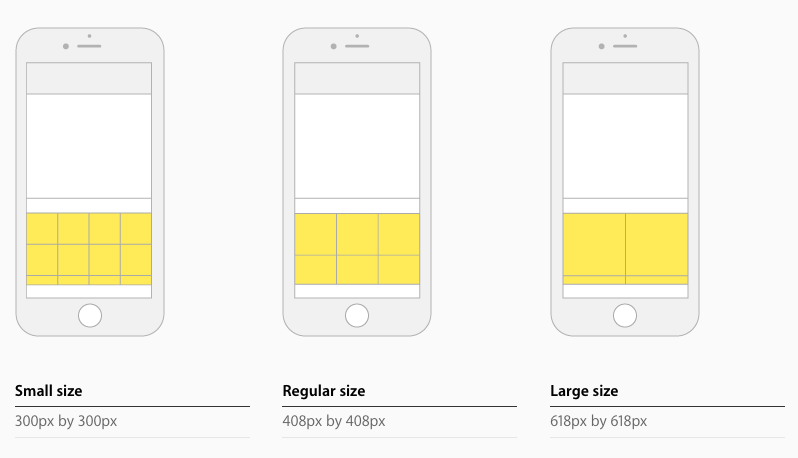
As you can see, there are 3 available size choices for stickers. Pick one, and use the above listed pixel dimensions as the size for ALL of your stickers.
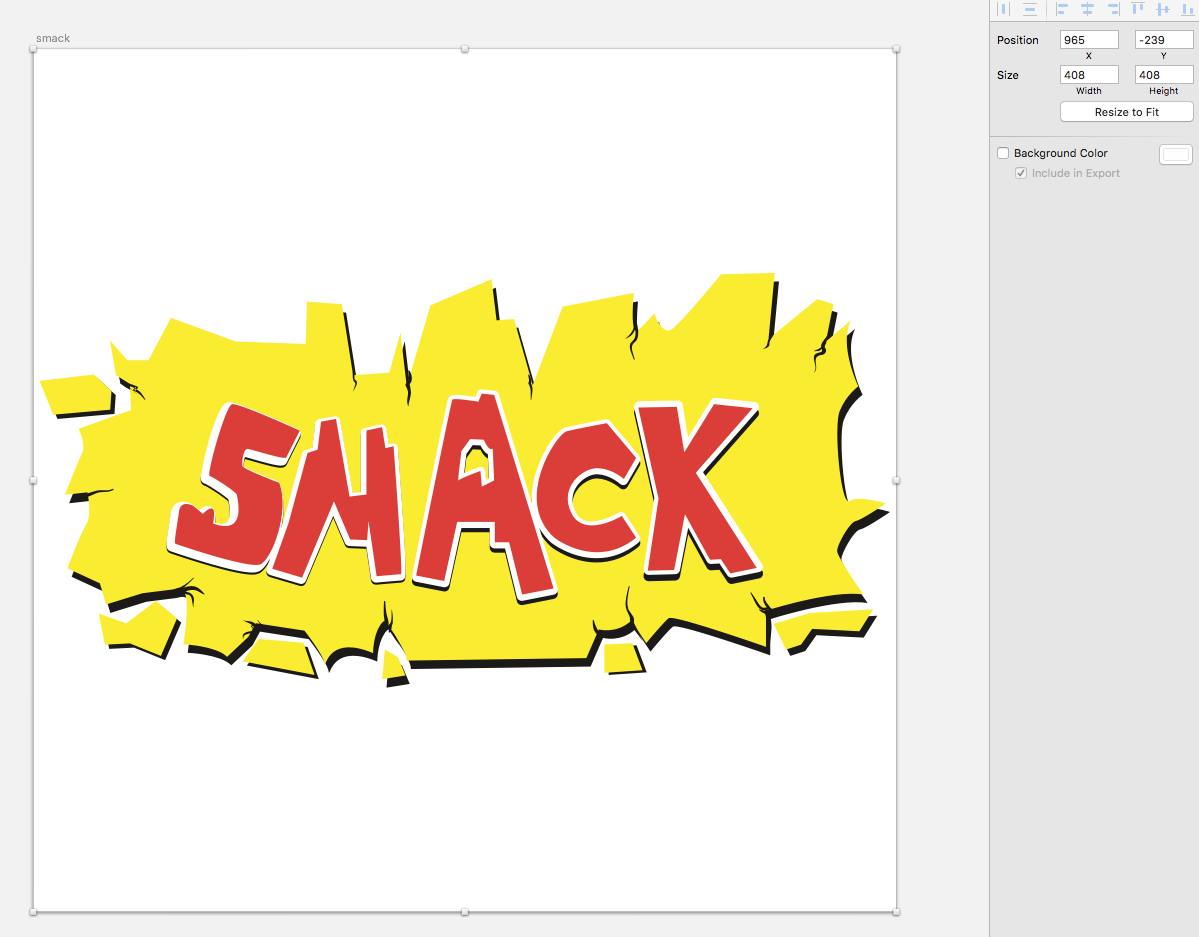
For this example I’ve chosen to go with the “Regular Size” stickers. So, I’ll open Sketch and create some art boards which are 408px in height by 408px in width.
Now I’m using some comic book style word art I found online. I simply pasted the images into Sketch art boards and resized them down to 408px both high and wide. When exporting, use one of the following file formats: GIF, PNG, APNG. I use PNG unless I choose to animate my stickers.
Finish creating your stickers and then let’s move to the next section.
CREATING THE XCODE PROJECT
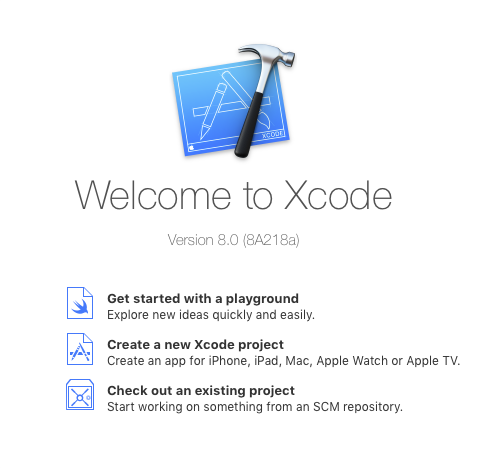
Open Xcode and choose ‘Create a new Xcode project’.
From there, let’s choose ‘Sticker Pack Application’ then hit next.
Name your app and let’s move on.
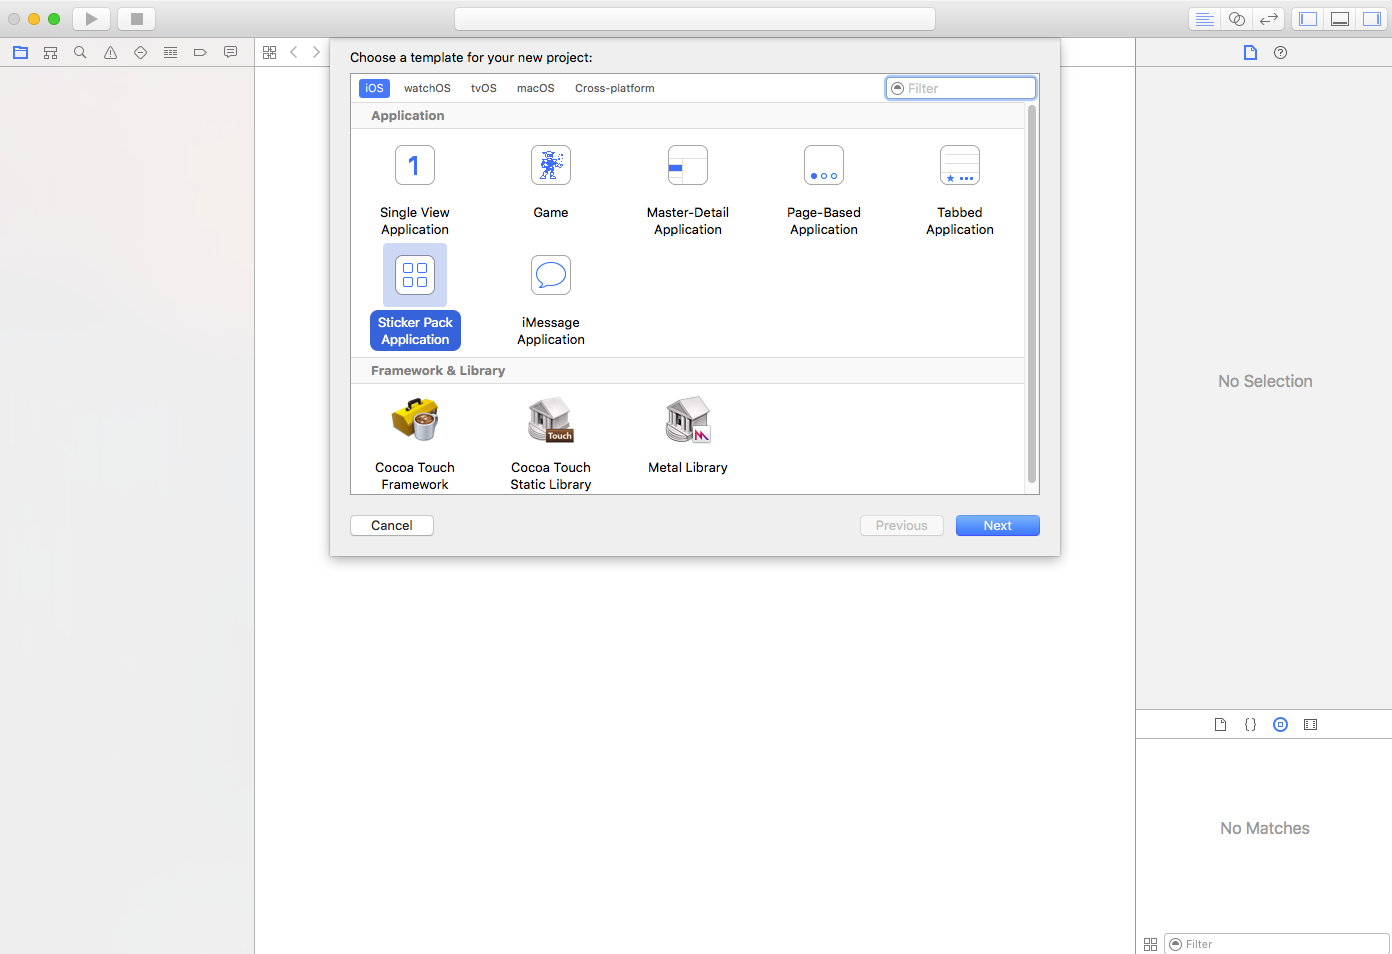
BUILDING THE XCODE PROJECT
In the Navigation panel, you’ll see a folder titled ‘Stickers.xcstickers’. This is where we will put all of our sticker and app icon files. Click the folder icon in the Navigation panel to view the contents of the folder, which has two folders inside. The first is the icon set. This is where we will put all of our app icon files. The second is the stickers folder where we will put all of our sticker images.
Let’s start with the stickers, themselves.
Open a new Finder window and navigate to the folder where you’ve put all your sticker images. Drag and drop your sticker image files into the Stickers folder in Xcode. You may rearrange the order of the stickers by dragging the images around in the Stickers folder.
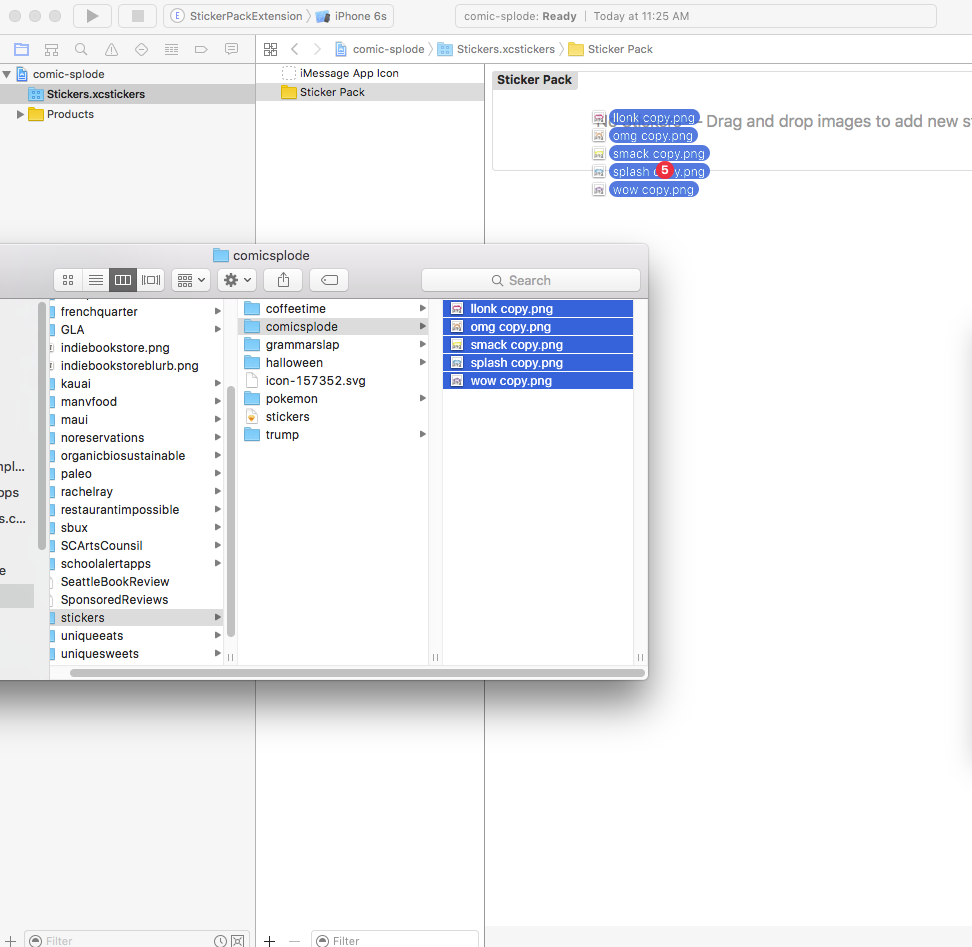
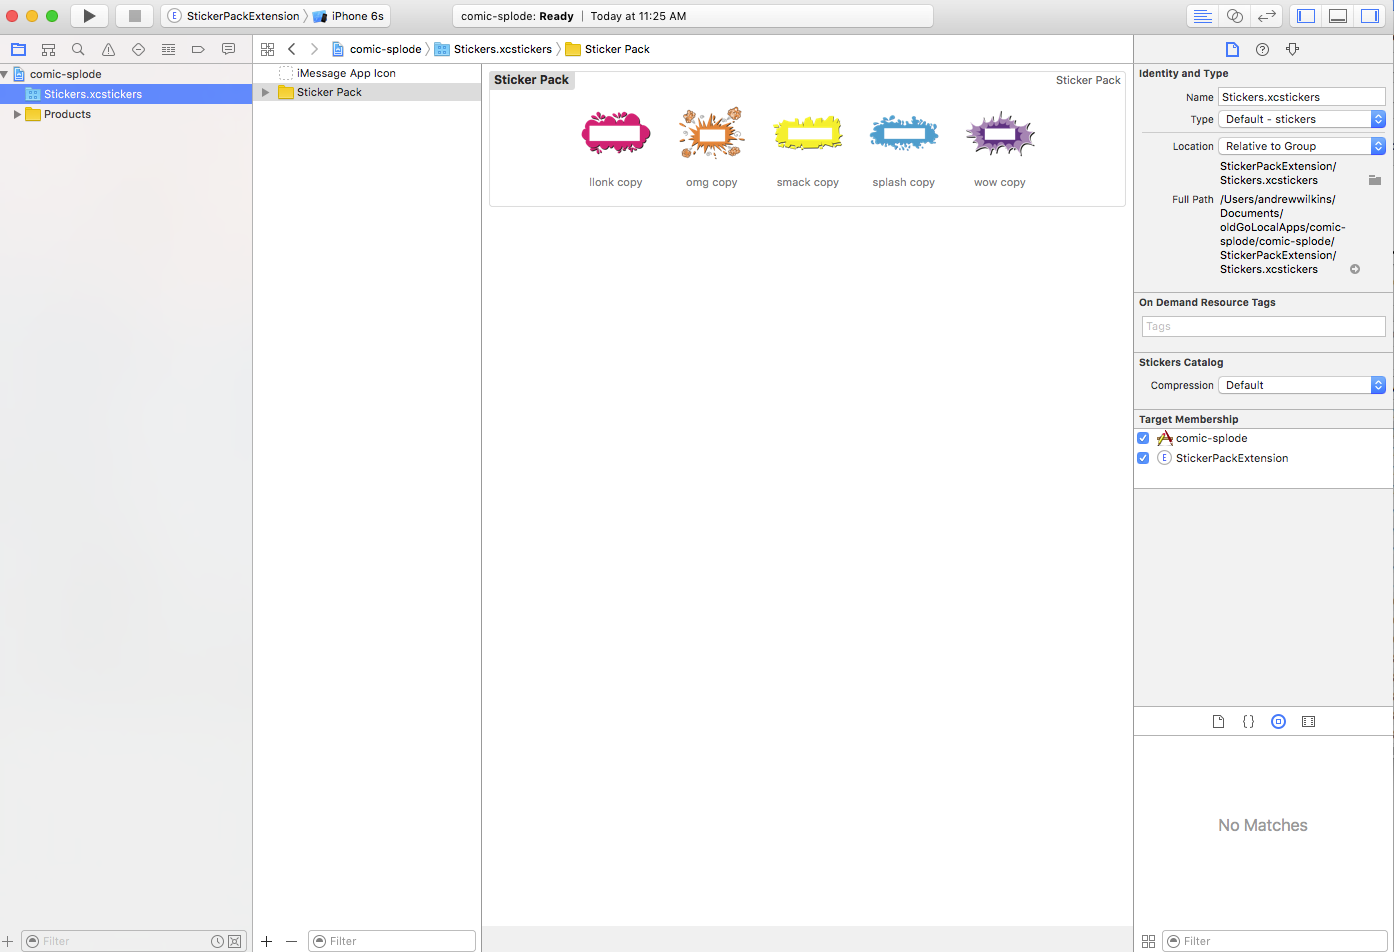
Repeat the same process for the iMessage App Icons folder. See the below listed sizes.
NOTE: Something different about iMessage and Sticker Pack apps is their requirement for rectangular app icons. You can use the below listed icon sizes taken from Apple’s iOS Human Interface Guidelines to generate your app icons. You’ll need to explicitly create and import each size listed.

UPLOADING TO ITUNES CONNECT
Once you are satisfied with the app icons and the sticker content you’ve created, you’ll be wanting to distribute it on the App Store. Let’s see how this process works.
Firstly, you’ll need to create App ID’s and Distribution Certificates for the iMessage App AND the Sticker Pack Extension. This is a critical step you will not want to miss. Even with the updates to Xcode’s handling of signing assets it’s easy to screw up. The fool-proof way to navigate this process is coming up next.
Grab the Bundle Identifier for both targets in your project. They should be exactly the same, but the Sticker Pack Extension bundle ID should have ‘.StickerPackExtension’ appended to the end of the iMessage app bundle ID.
In my example
- iMessage app bundle ID is ‘com.golocalapps.comic-splode’
- Sticker Pack Ext bundle ID is ‘com.golocalapps.comic-splode.StickerPackExtension’
Head over to developer.apple.com and create the necessary App IDs. Then, create App Store distribution provisioning profiles for both the sticker pack extension App ID and the iMessage app App ID. I like to name my App Store provisioning profiles for the iMessage app as ‘(App Name) App Store’ and the profile for the Sticker Pack Extension as ‘(App Name) Sticker Extension App Store’. This makes them easier to discern from one another.
Download the provisioning profiles for both App IDs and double-click to open them. Xcode will not do anything beside come to the forefront when you do so. Don’t be alarmed, we are still on the right track.
In Xcode, move to your Targets list, then find the Signing section under General. Uncheck the ‘Automatically manage signing’ checkbox. This will open the manual signing section.
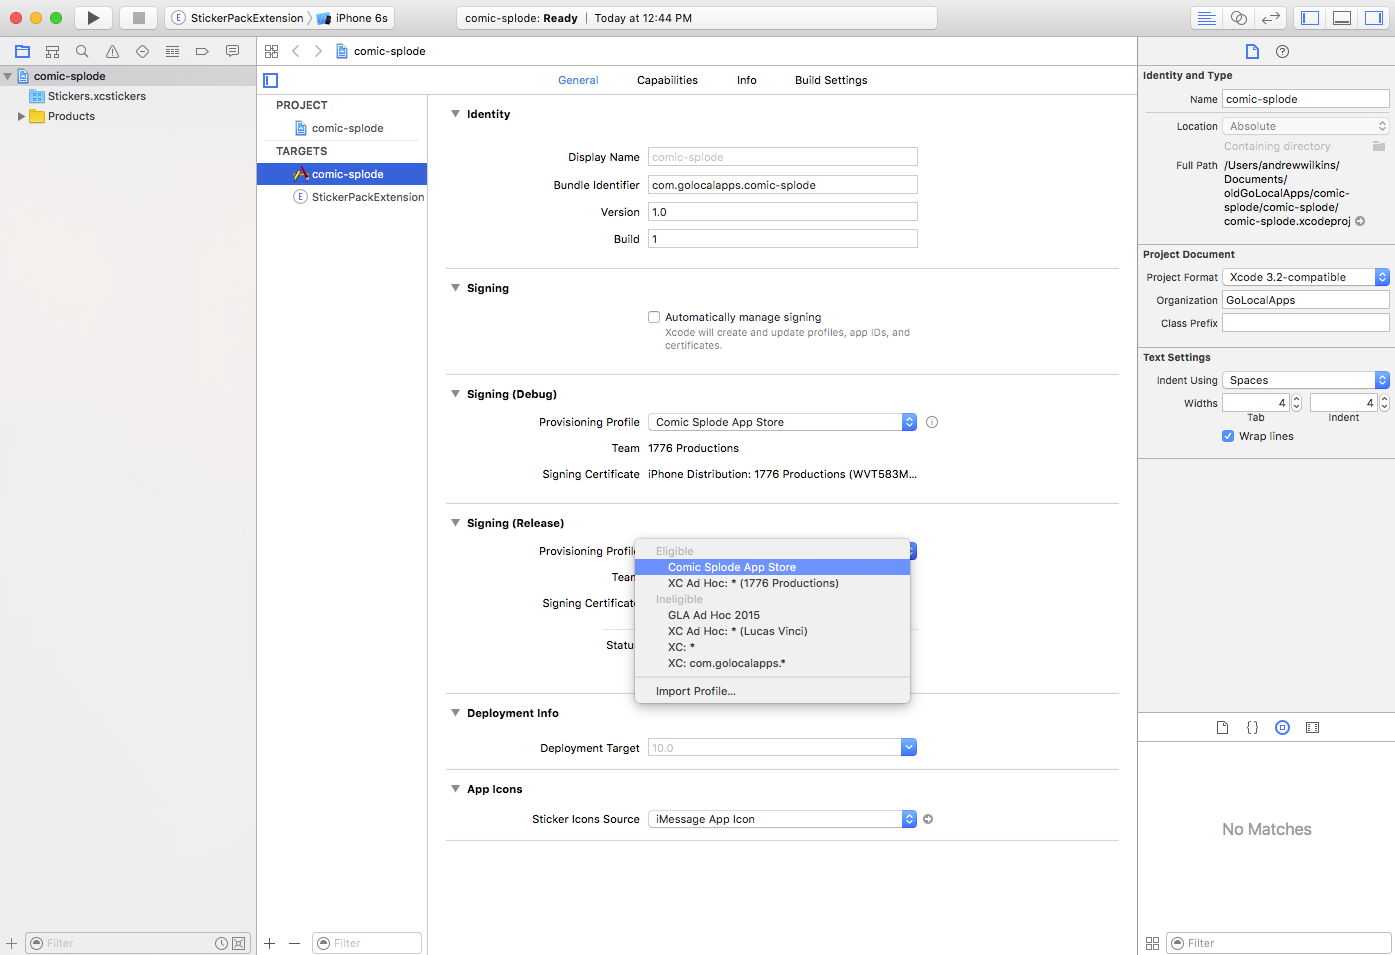
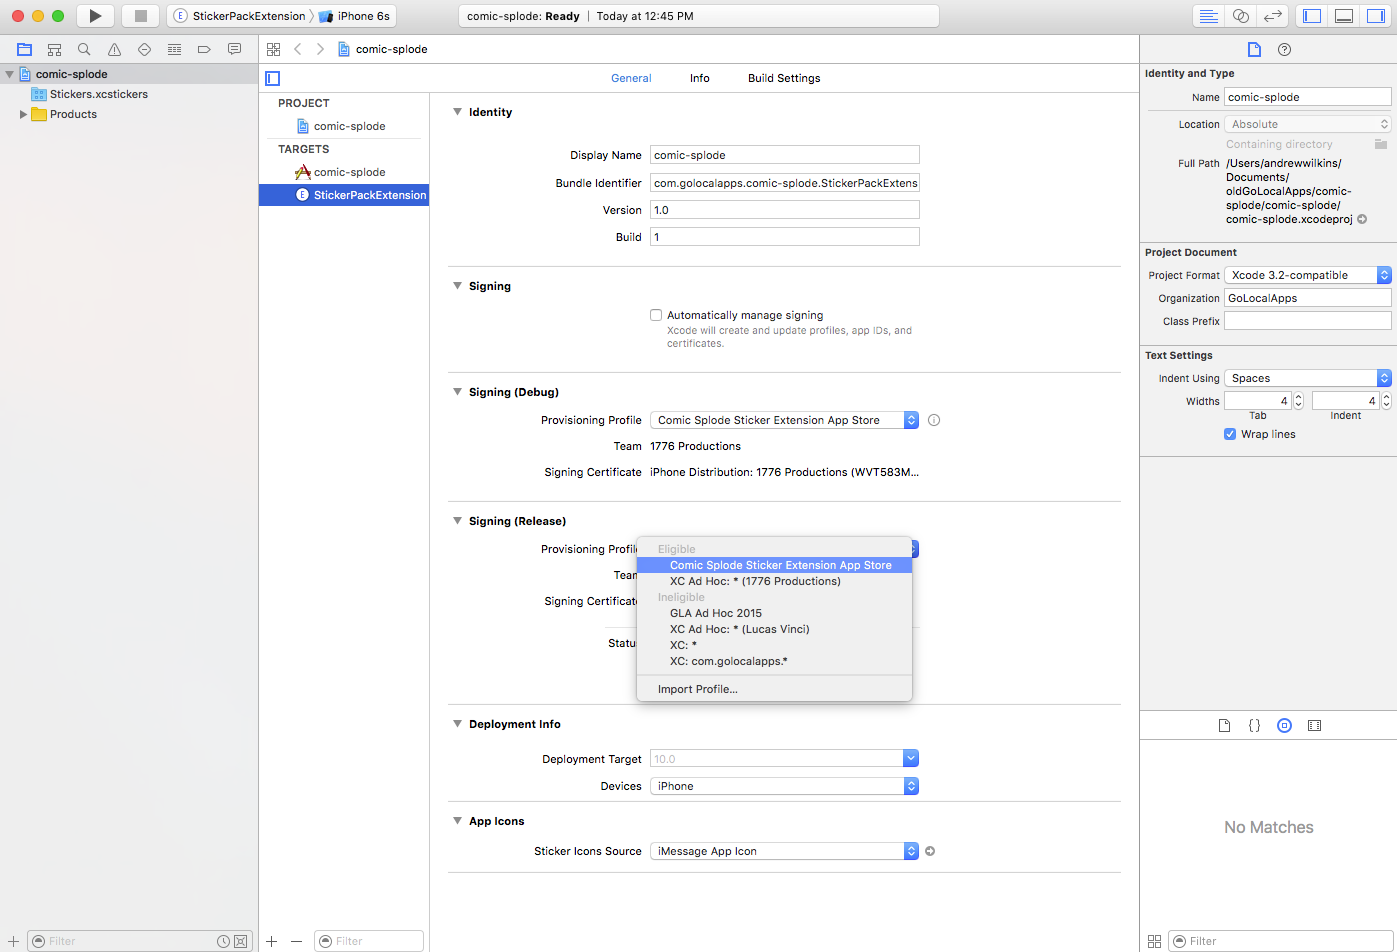
From the dropdown select menu choose the title of the correct provisioning profile (com.yourteam.appname). It should show up under ‘Eligible’ in the dropdown select menu. Do the same for the StickerPackExtension signing section.
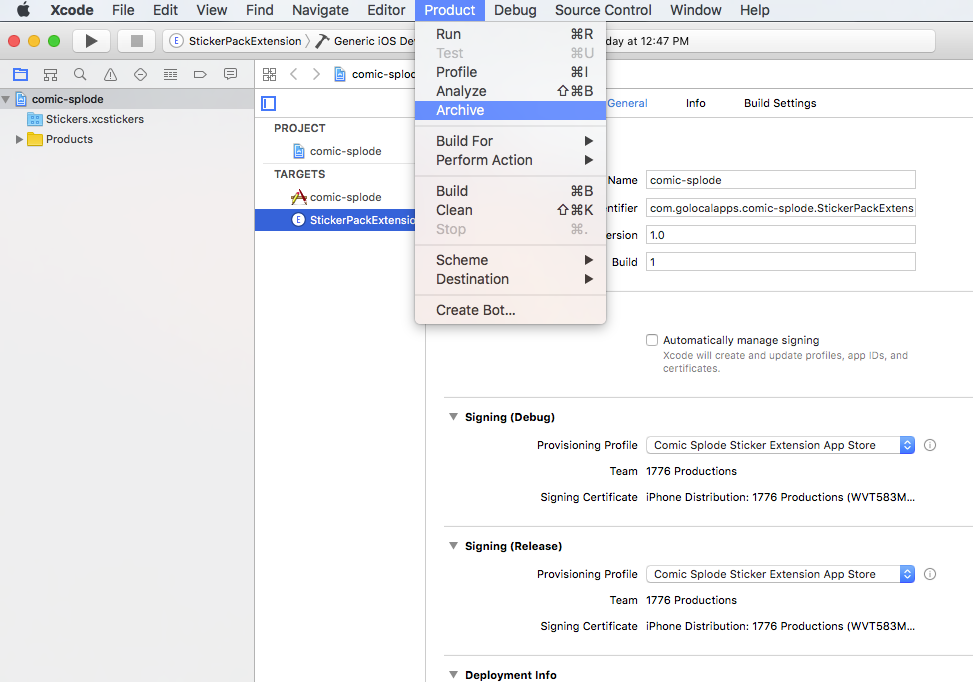
Now, with the StickerPackExtension target selected in the run menu targeting ‘Generic iOS Device’, go to ‘Product’ then choose ‘Archive’.
Let’s jump over to iTunes Connect so we can set the table for our new Sticker Pack app.
CONFIGURING ITUNESCONNECT FOR UPLOAD
Log in to itunesconnect.apple.com and go to the My Apps section.
Click the ‘+’ button to add a new app. Choose ‘New App’ then fill in the requested information. Platform should be set to iOS. Choose the iMessage app bundle ID (com.yourteam.appname) for the bundle ID section. Click ‘Create’.
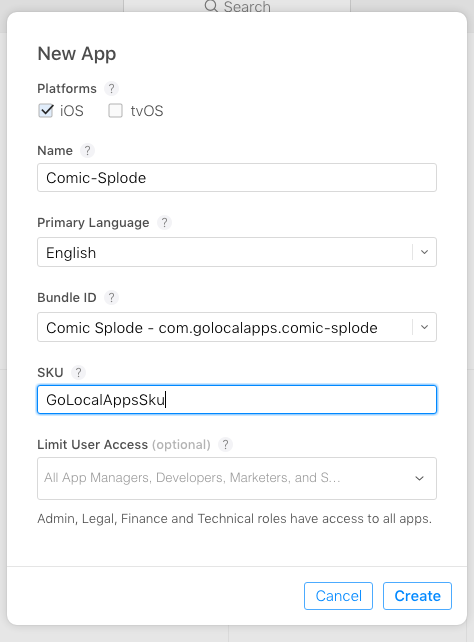
From there, it’s easy to fill in the rest of the iTunes Connect information. The process will be the same as any other iOS app.
Head back to Xcode and open the Organizer (Window -> Organizer). From there, choose the newly created app archive you wish to upload to the App Store. You may choose to Validate first, or go straight for uploading to iTunes. Your choice.
I hope this article has shown you how to create an iOS Sticker pack for yourself or for your clients. For the most part, this process is similar to any other iOS app distribution. The few minor changes to the creation and distribution process should be outlined strongly enough in this article for most iOS developers to follow along easily.

